Photo Editing Project
For this assignment we were to take images of ourselves or friends, and first turn them black and white, and then using layers and adjustments in Photoshop give them filters and put the photos in different art styles. So I took this really terrible mugshots and made then 10x worse with these filters!
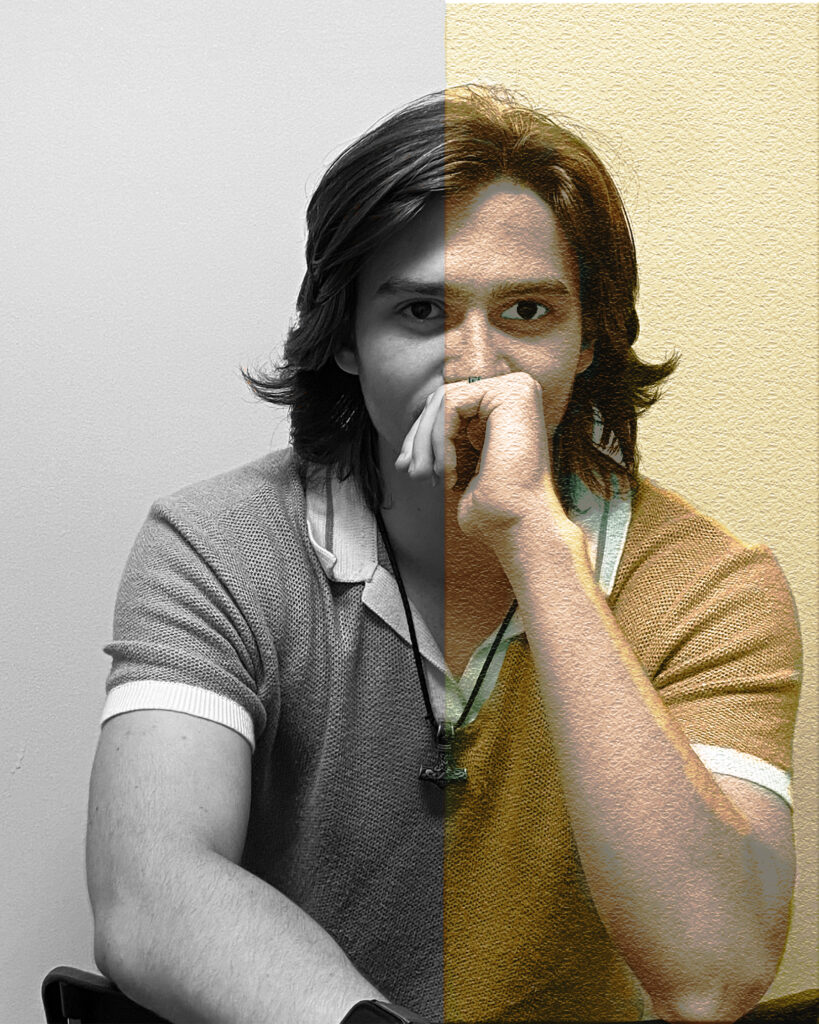
Rococo Style:

- For this first image, I started with the untouched photo on the left and used a simple black and white filter to remove the color, leaving just the value.
- I then used a few solid color layers with the Color blending mode to color in some of the image, like my hair, skin and shirt.
- Then I used a saturation layer to lower the saturation by -30, in order to wash out the color a bit and turn them more grey.
- Next I used the color balance tool to add to the reds and blues in order to give the image a colder tone.
- I then grabbed a Gaussian Blur to help blur my image and brighten it up a ton.
- I created a new layer on top and created a canvas texture which helped the image look more like a painting.
- Finally I fooled around with the curves a bit, creating a slight S curve to help finalize the colors.
Vaporwave Style:
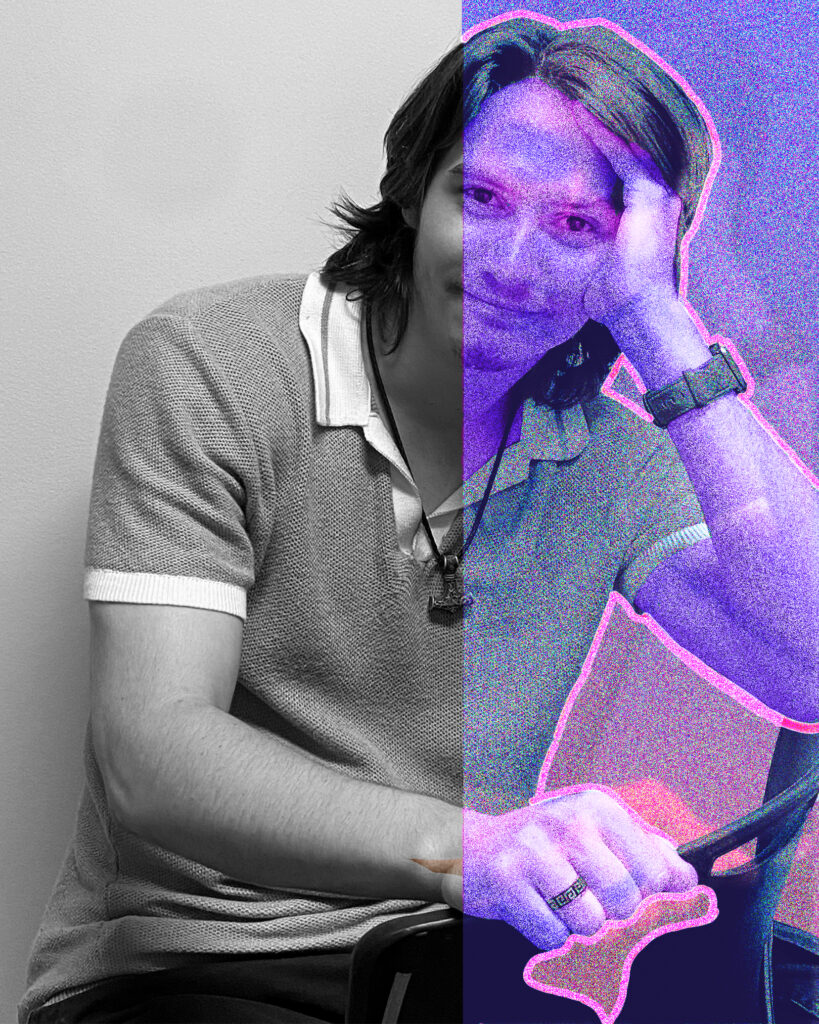
- For this image I started with the untouched photo on the left and used a simple black and white filter to remove the color, leaving just the value.
- I then created this simple gradient background behind the focus of the photo.
- Next I took the curve tool and curved the colors a bit so that my subject lost a bit of detail and brightened up a bit.
- Then I created a texture layer and added some noise to create fuzz over the picture.
- I then created a layer where I drew an outline around my subject with a Gaussian Blur effect along with an inner glow to make it look bright and neon like a light.
- Then I added a Solid Color layer using the Color blend tool to color parts of my subject.
- Next I created another Solid Color layer and used an Overlay with a blue to add more colors with the scheme.
- Then I created a glitched effect by grabbing my subject, duplicating it and then using the Overlay blend I dragged it a bit up and to the right to give the image the glitch effect.
- Then I saturated the image, used the brightness and contrast layer, and used a color balance to help with bringing out the brighter colors, creating a heavy contrast in color and lighting.
Renaissance Style:
- For this image I started with the untouched photo on the left and used a simple black and white filter to remove the color, leaving just the value.
- First I added a texture layer overtop the image to create the canvas depth.
- I then used a few Solid Color layers with the Color blend mode to give my image some colors. I stuck with mostly earth tones to create a warmer image.
- To enforce these earth tones, I took another Solid Color layer and made a dark green layer overtop with the Soft Light blend mode.
- I then made another layer with the Overlay blend mode and drew over parts of the image to brighten them and enforce the highlights of the light source.
- I then did the same thing in reverse using a layer with the Darker Color blend mode and drew over the shadows, darkening them and creating a more dramatic mood.
- I then used a Solid Color layer with the Color mode to create the background color.
- I added a saturation layer to up the saturation and warm the image.
- Then I used Brightness and Contrast to up the brightness and the contrast.
- Then I created an S curve to balance out the colors.
- Then I used the Vibrance layer to strengthen the vibrance.
Post-Apocalyptic Style:
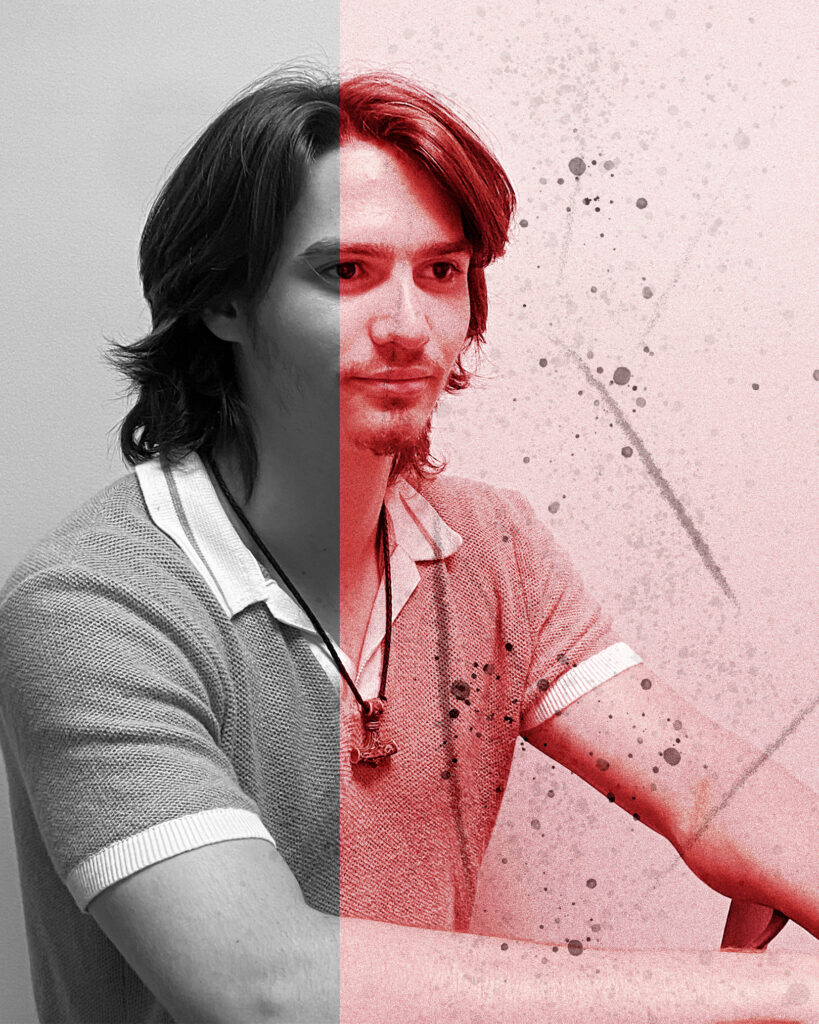
- For this image I started with the untouched photo on the left and only used the black and white filter on the side I wasn’t planning to edit. I felt that leaving the color on this one would force me to use more of the adjustment layers.
- I started by lowering the saturation and washing out the image.
- I then added a ton to the contrast, creating a dramatic tone and enforcing the lighting and shadows.
- Then I created an S curve to smooth out the image a bit.
- Then I added a red filter over the image using a Solid Color layer with the Soft Light blend mode.
- Then I added a Solid Color layer with a grey color and the Overlay blend mode to help make the red light look more, “nuclear-explosion”-like.
- Then I used the color balance to help bring out a bit more of the red.
- Then I created two texture layers, one with spots and dots like burn marks a splotchy brush, and one with scratches using another brush this one being much thinner.